How to Use the Scanning Process and Clean Your Entire Photo Collection

Managing a huge photo collection can be a little tricky at times. If you just handle a few photo albums, it can be easy for you to manage, however, if you have multiple albums with sub-categories, you may need a lot of time to manage them. The manual process to scan and declutter your photo albums is a time taking exercise. You may need some tools to manage large albums accordingly.
When our photo albums become clumsy on our smartphones, we transfer all the photos on our PC without filtering the odd ones. It is important to scan photos and filter out unwanted ones. Basically, you will be able to find some duplicate or blurred photos that are of no use. Let’s explore the manual and automated methods to filter and Clean Your Photo Collection.
How to Scan & Declutter Your Entire Photo Collection
There are different methods used to delete duplicate photos and clean up your pc. Manual methods are time-consuming and involve checking each photo separately while the automatic method allows you to find and delete duplicate photos with a single click. Let’s check out each method and then jump to a conclusion. Let’s begin the article!
Method 1: Scan Photos on Android
Every Android comes with a Google Account. Check the Google folder and look for Files by Google.

Step 1. Go to the Google folder on your smartphone and tap on Files by Google.
Step 2. Tap on the Clean button at the bottom left.
Step 3. Scroll down and tap on Select Files under the Delete Blurry Photos tile.
Step 4. Tap to select blur photos and then tap to move files to Bin.

Step 5. Come back to the ‘Clean’ tab and tap on the ‘Select Files’ option under the ‘Delete Duplicates’ category. Once again, select duplicate photos and tap to move files to Bin.
Step 6. Do the same process for the Delete Old Screenshots option and delete unwanted photos. Once you have cleaned all the unwanted photos, go to the Bin and permanently remove all the unwanted photos from your Android.
Method 2: Clean Your Photo Collection on Windows Explorer
If you have already got your photos on the PC, you can make use of Windows Explorer to clean your photo collection. Also, it gives you a wide viewing screen to select multiple photos and remove them from your albums.
Step 1. Access Windows Explorer by pressing the ‘E’ key.
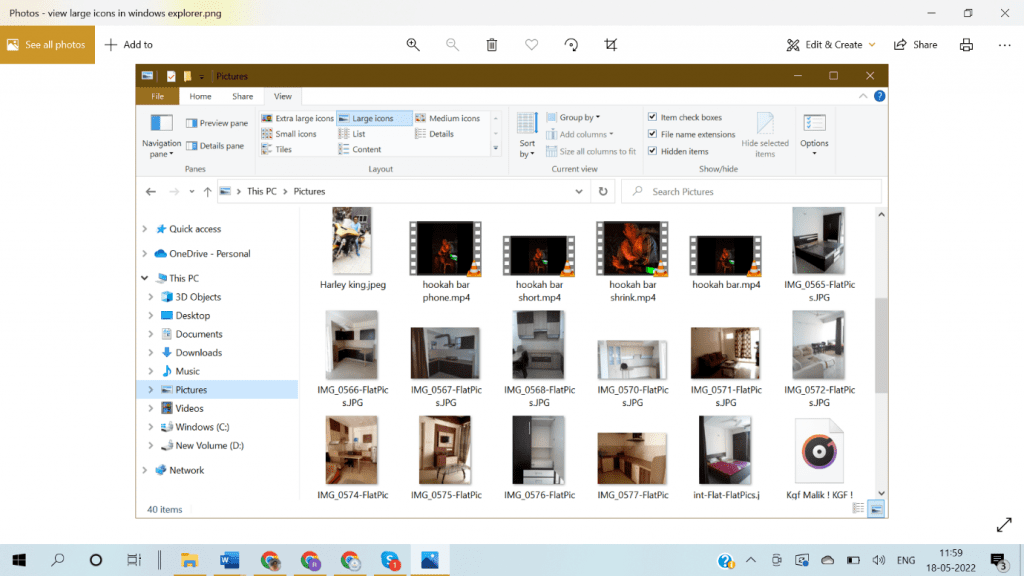
Step 2. Now, tap on the Pictures folder in the left panel and go to the album that you want to clean.

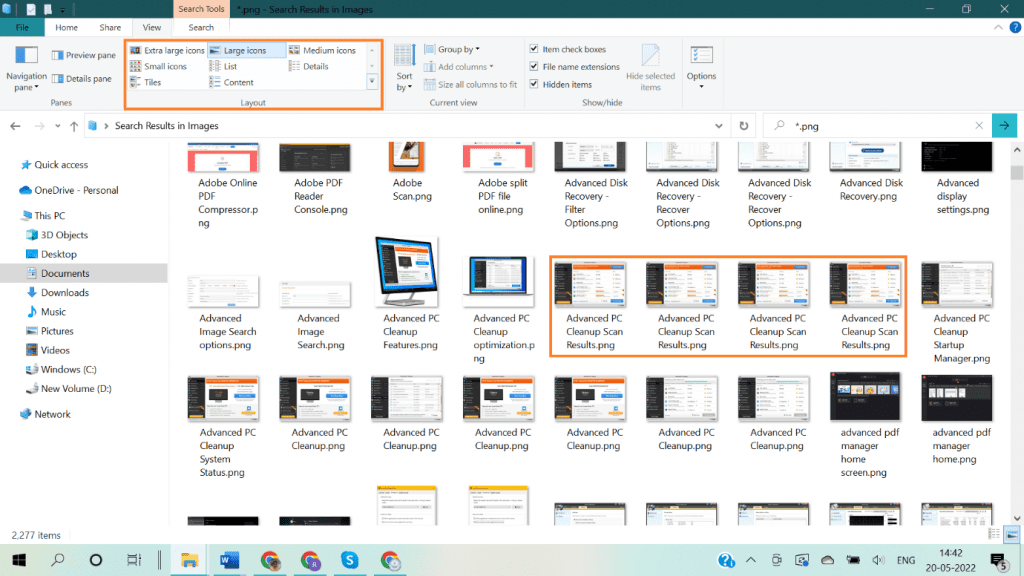
Step 3. Tap on the View menu and choose the Large Icons option from the Layout section.
Step 4. Press and hold the Ctrl key to select multiple items. After this, click on the photos that you wish to choose. Scroll down the album and keep on selecting unwanted images.
Step 5. Once selected, press the Delete button to send the selected photos to the Recycle Bin. Follow the same steps for all the photo albums and scan photos that you wish to remove.
Method 3: Clean Your Photo Collection with Photos Viewer
Microsoft Photo Viewer is an easy option to preview and delete unwanted photos. This app gives you the option to scan photo albums and delete photos one by one.
Step 1. Press the Win key with the E key to access Windows Explorer.
Step 2. By clicking on the Pictures folder go to the album that you wish to clean.

Step 3. Double-click on the first photo from the album and use the left/right arrow keys to go further. As soon as you find a photo that you don’t want anymore, hit the Delete key and confirm the selection.
Step 4. Follow this process to scan photos in all the albums and remove unwanted photos from your albums. All the deleted photos will be stored in the Recycle Bin. Always clear the Recycle Bin once you are done decluttering your photo collection.
Method 4: Duplicate Photos Fixer

Another way is to use Duplicate Photos Fixer Pro is one of the best duplicate finders and removers to clean your photo collection. In order to delete similar photos are purely unwanted clutter on our storage device that needs to be cleaned up regularly. Duplicate Photo Fixer Pro has wide compatibility with all the latest versions of Windows, MacOS, Android, and iOS devices. You can also directly scan photos from your cloud space like Google Drive or Dropbox.

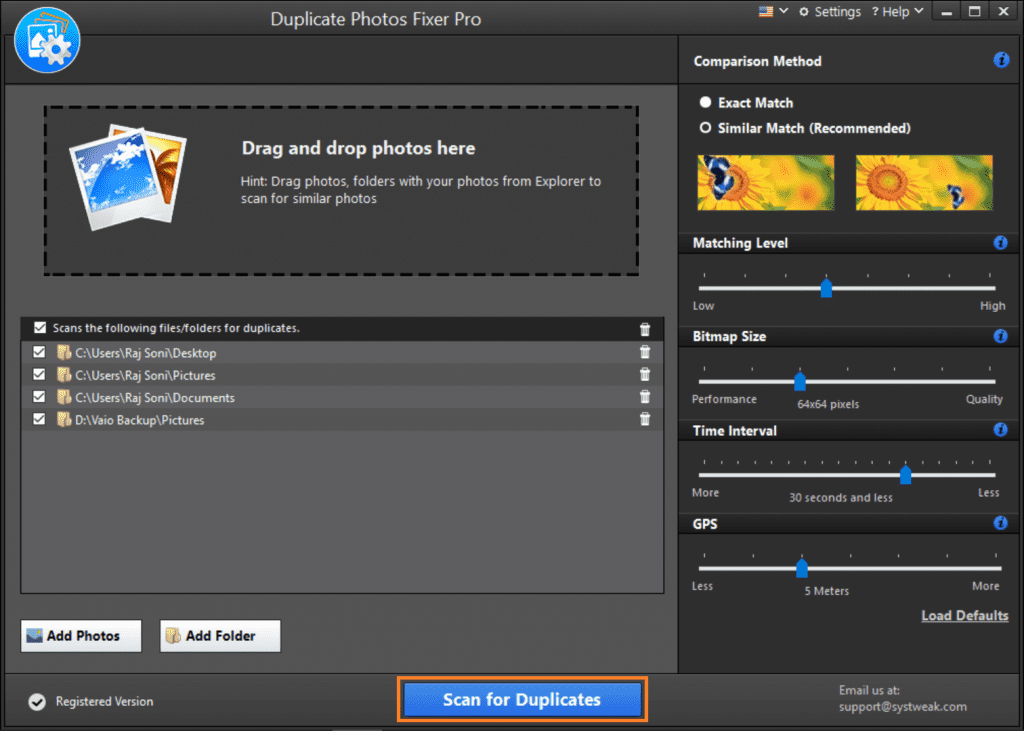
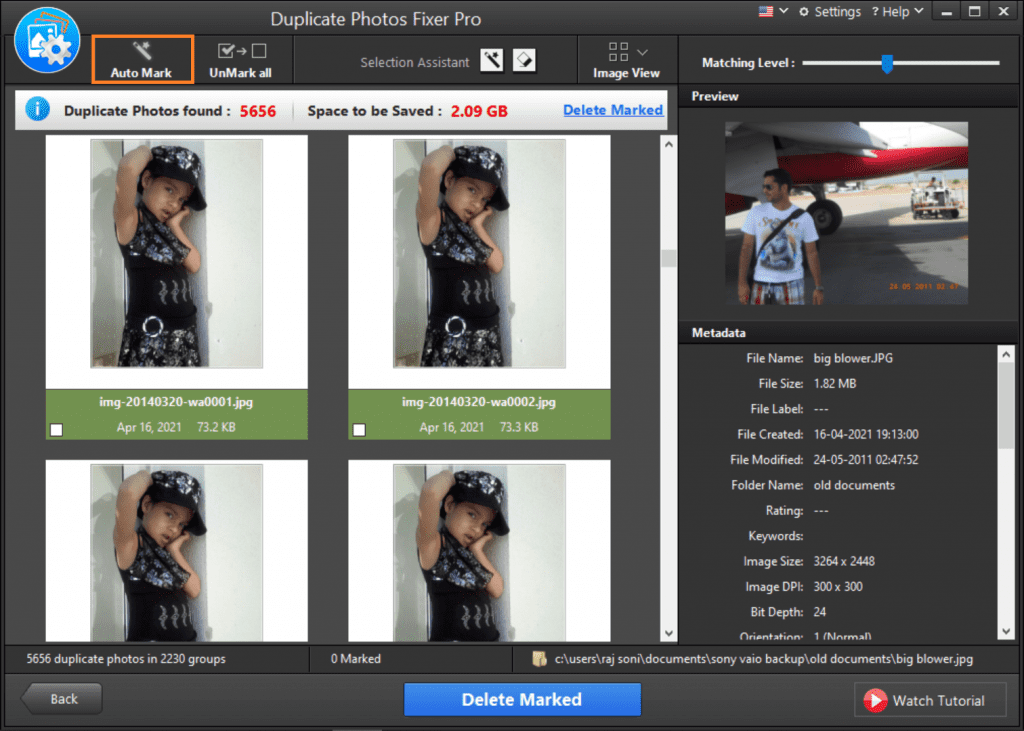
Thus, cleaning your photo collection using Duplicate Photos Fixer Pro is easy. Just download, install, and activate the product. Select the folders from where you wish to scan photos and click on the Scan for Duplicates button. It will scan photos and display all the found duplicates in groups for you to preview and select. You can select duplicate images manually or click on the Auto Mark button to select them all at once. Click on the Delete Marked button to remove duplicate photos.
Final Words :
This article on how to scan photos and declutter your photo collection has the best methods to clean your photo collection. Basically, the manual methods can be tiring yet can’t bring accuracy to free up space and delete unwanted photos still, you can automate the process with the best duplicate photos fixer to scan and list out all the unwanted photos. Therefore, we will suggest you use the automated process in order to clean your pc.
Author Bio:
Camila Saunders is a tech blogger. She loves to share insightful guides and tactics that convert traffic. She majorly focuses on Windows and Mac. She also loves to write about duplicate photos fixer pro software and driver updater.
Also Read: Top CyberSecurity and Technology Predictions for 2022


